HOME Home About Subscribe Features FAQ Beauty Fashion Lifestyle
Showing posts with label DIY. Show all posts

Thursday, March 27, 2014

DIY Hair Mask

Few things are more pleasant than spending a night in, with a good book, a scented candle, a long bath and, of course, some pampering! It might sound high-maintenance, but it is in fact a surefire way to keep a busy mom's sanity.

As for the pampering part, I've got an idea here for you:
This hair mask is ridiculously easy to make (literally takes 5 minutes!), and it is perfect for dry, dull hair (like mine!). For those of you who heat style it on the regular, this one is for you too. If your hair is super oily, on the other hand, perhaps stay away from this one. The best part of this is that you probably already have all the ingredients in your kitchen! Whenever you are feeling like a little TLC is in order, just head to your pantry and in less than half an hour your hair will be a happy, hydrated camper, just perfect to welcome spring! woohoo!

Here is what you'll need:


- 1 Egg yolk: Its many proteins, vitamins and fatty acids nourish and moisturize dry hair.
- 1/2 Avocado: Also full of proteins that restore the health of your hair.
- 1/2 cup of milk: The nutrients in milk strengthen and fortify the hair's cells.
- 1 teaspoon olive oil: Olive oil is full of fatty acids that coat the hair and protect it from damage.

The process is as straightforward as they come:

1. Mix all the ingredients in a bowl, until you have no chunks left (trust me, they are not fun to rinse off, specially the avocado!).

2. Separate your dry hair into different sections (at least 2, but it varies according to how much hair you have).

3. Apply the mask from the ends up but avoid the roots, as they are normally much oilier than the rest of the hair.

4. Leave on for 15-20 minutes. A shower cap will make it more concentrated and prevent the mask from getting everywhere! Shampoo and condition to rinse off.

5. Marvel at your shiny locks!


I know it is not the prettiest-looking mask, but who cares about the mask if your hair looks amazing!


 photo Footer_zps0751fb70.jpg

Wednesday, March 26, 2014

My DIY project: Affordable Decorations For Spring


I sometimes come across beautiful crafts on Pinterest and blogs, and I immediately fall in love with them and want to make them. Then I start actually reading the instructions... Look, I am not extremely gifted in the crafts department, so for me to actually attempt a craft project I need it to be easy and straightforward, yet still useful and pretty. Is that too much to ask?

Turns out no, it's not. I started "My DIY Project" to find just that: easy, simple projects that are great and look like they were a lot more difficult to make. My very first project is to attempt some cute decorations to welcome spring (not that we get any spring whatsoever where I live, but a girl can dream!). I did three mini-projects, perfect to celebrate the arrival of the colorful season. I focused on pink and gold, because I love those colors and go perfectly for the time of year. More importantly, they were incredibly easy and dirt cheap.

The supplies I used were:
- Several canvases in different sizes
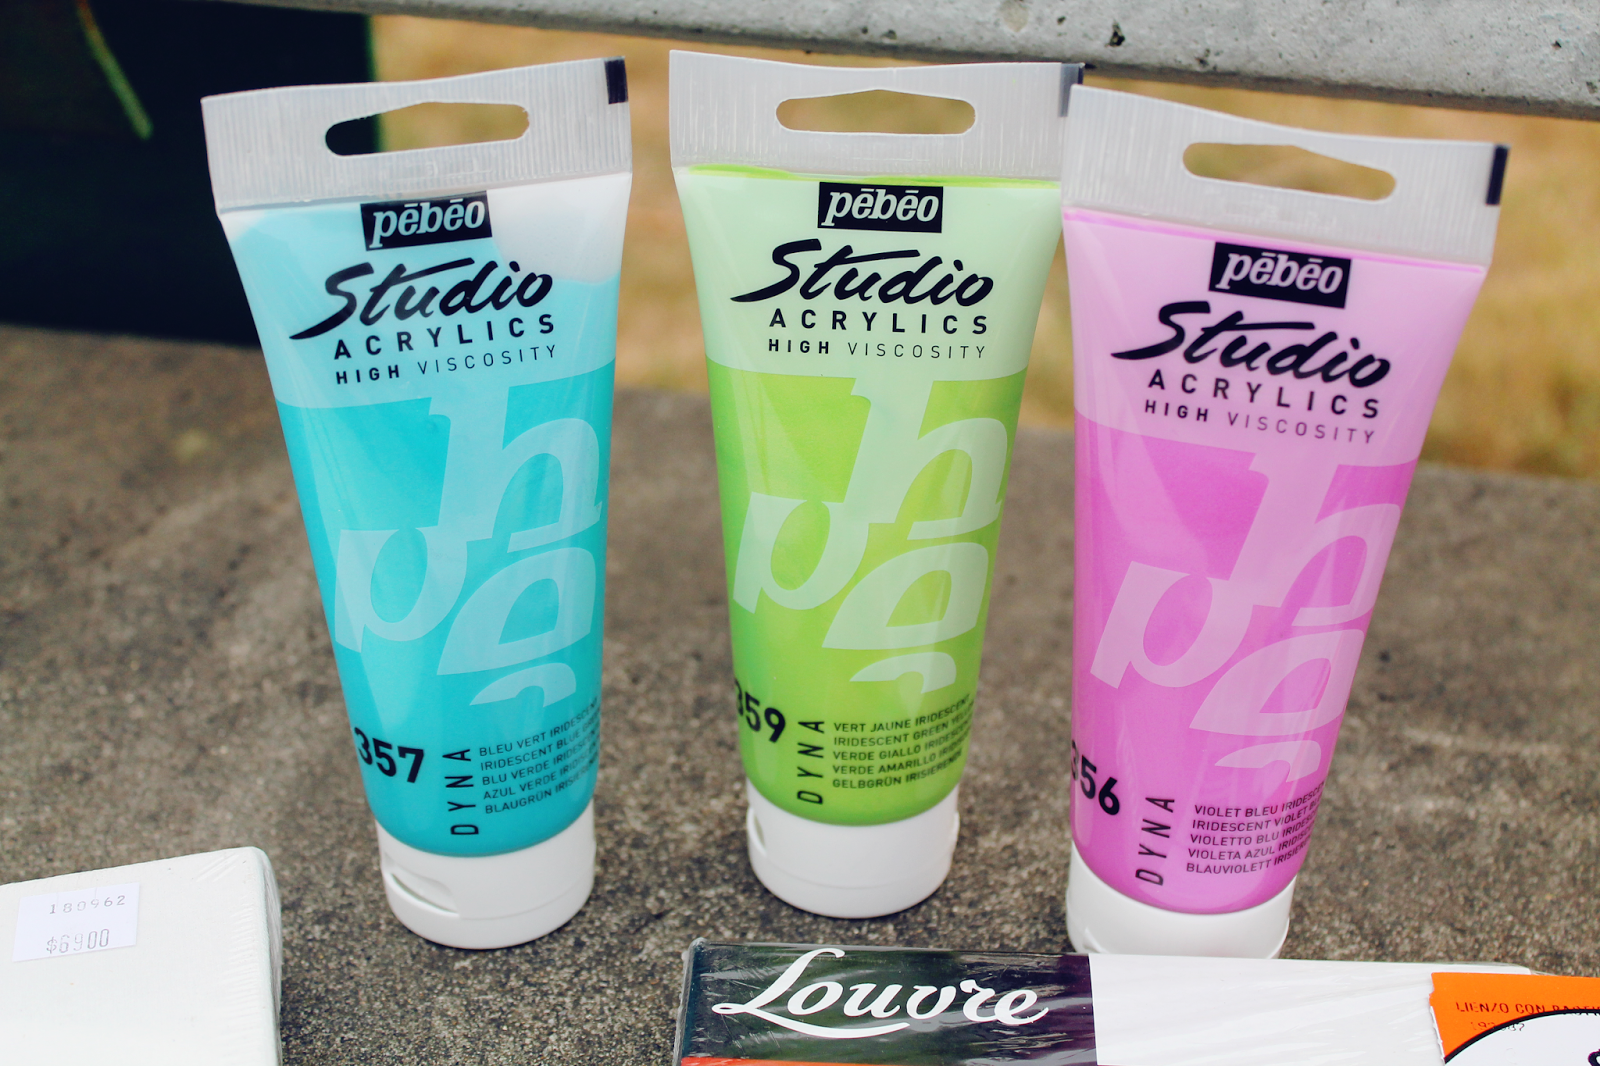
- Acrylic paint in your favorite colors (I chose iridescent ones, because I wanted lots of shimmer!)
- Ribbon
- Used pots/ bottles/ mason jars.
- Circle sponge
- Wrapping paper


1. A little wall art
I am so useless at art, but I gave it a shot and was very proud of having left my comfort zone for this. Even if it didn't turn out amazing and stunning, it is mine and I actually quite like the imperfect look. For the first canvas, I was inspired by this statement wall. I think it is gorgeous and creative, so I decided to incorporate it onto my little canvas with one of my favorite sentences: "Trust The Universe". This took all of 15 minutes to make, plus drying time. Simple as that.

super chipped nails  (I know, I know!)
You can always go over with some white paint and correct little mistakes!


Then I took the larger canvas, and painted the whole surface with iridescent pink acrylic paint. Then all I did was cut out some stripes of gold ribbon and glue them, leaving about 1/2 inch between each of them to create the pink/gold stripes. Again, this took about 15 minutes.

The medium canvas I gave to my husband to decorate, and he opted for some chinese characters in gold and black, and some iridescent navy polka dots which he achieved with the circle sponge.


2. Pencil Holders
I have a *small* obsession with beauty/bath/body products. There, I said it. So I have a collection of used pots and containers, and this was the perfect opportunity to upcycle them. I simply bought three sheets of the most gorgeous wrapping paper I found at the store, and wrapped some of the pots with a different design. It was as easy as that. They now look a lot cuter and very useful to store all those bits and pieces we have lying around in the house.

Note: make sure your containers are clean. If you remove the tags (I did), wipe the container with some rubbing alcohol to completely remove all the sticky residue left.

On one of the pots, my husband drew a little tribal rose which I then painted pink, and also painted the rim gold.

And for the polka-dot one,  I simply used the circle sponge to dab some polka dots in different colors. Then I went over the rim of the pot with gold acrylic paint to give it a more "finished" look. It is a very simple pot, but the little pops of color make it perfect for spring and for planting some seeds or a cute little flower inside. This took all five minutes to make!


3. I then chose to use the big mason jar as a vase to give it an even more spring-y feel. I bought some cute fake flowers and put them in there, and don't they look pretty? Now they sit in my room.

I am a proud little bee now with my cute new spring decorations, imperfections and all!
Please let me know if you are going to try any of these :)


 photo Button1_zps4b1eff04.png

Thursday, February 20, 2014

Activities For Kids On A Budget

We hear it everywhere: having a baby is beautiful, and gorgeous, and demanding and overwhelming all at once. And yes, it is all those things, but something else it is? EXPENSIVE!  From having to buy more diapers than the number of surgeries on Joan Rivers, to the million activities they start undertaking as they grow older, a little human can take a major toll on your wallet!

However, as they grow they need to see and explore and discover and learn, so cutting out on their activities when the budget is small isn't a very good idea. It is during those times that parents need to make use of all their creative neurons and find dynamic, fun activities to do with their little ones without breaking the bank. This list I am providing below isn't exclusive to parents, though! If you are babysitting for a relative or friend, or just want to do something fun with the kiddo in your life (and even if you do have spare cash), here you can find some inspiration for different activities to do with them.

1. Go hunting for funnily shaped rocks/leaves/etc: Go with them to a nearby park (or even your backyard) and have a contest to see who can find the funniest rock or leaf or anything else you see there. Then try and see what it is shaped like (perhaps a dinosaur? a car? a bird?).
We are trying to find a rock shaped as another "plane" so mommy can fly too.


2. The classic fort: An oldie but a goodie! Make a fort in your living room out of pillows, blankets and rugs. If it is dark, grab flashlights and pretend to be camping there.
3. Create your own game of memory: With some paper or cardboard and some markers, a basic game of memory can be easily created. Make an even number of flash cards out of the paper, draw a simple picture (twice), face them down and spread them evenly on the floor and let the child turn them over and match them.
4. Prepare a concert: Go into your kitchen and grab an assortment of pots, pans, lids and utensils. Create different songs using them as your musical instruments. (Just try and not do it at night time - your neighbors might hate you after that!).
We didn't do a concert with this potholder, but we did have a puppet show!


5. Balloon Characters: This is a favorite! Firstly, make some papier-maché: cut some long strips of newspaper; make the paste with 2 parts of water, 1 part flour and a teaspoon of salt. Paint a layer of the paste on the newspaper strips and stick them on the balloon, applying even strips until you've built up a good, strong layer. Once all the strips are on the balloon, cover it with yet another coat of paste. Leave to dry for a couple of hours or if you can, overnight would be preferable because you want to make absolutely sure that the papier-maché has dried. Once it has, apply a base coat of white paint, and then enjoy painting all kinds of different designs and faces on it!
6. Mad Libs: There are hundreds of free printables on the Internet for hilarious mad libs for you to fill out with your kid. To make it even better, why not create your own version? One of you asks the question and the other one answers, and then read the final result. Then reverse the roles.
7. Bean-bag contests: A big hole in a cardboard box and some bean bags provide the setting for an awesome tossing contest, where the goal is to get the bean bag through the hole.
8. Have an election: Grab all of the child's stuffed animals (or cars, or dolls, you get the idea) and have an election to determine who shall be the Official President Of Stuffed Toys. Each of you can put forward your arguments as to why each toy shall/shall not be elected and then decide who will hold this very important title.
Turns out Mickey won this one because "he is the only one wearing pants". Fair enough!


9. Make a mud picture gallery: Make some mud with water and dirt, grab some cardboard or boxes that you aren't using, an old brush or toothbrush, and start painting!
10. Make Soup: Fill a container with water, go to your backyard/garden/nearby park and start finding "ingredients" to add to your soup. The mud from the previous point works wonders too!
11. Create a little house/room in a shoebox: Again, the more creative the better. Start filling the shoebox up with what you find: an old cloth can be made into curtains, for instance; a bed can be created by cutting a small piece of cardboard or with an old plastic container. A kid's imagination is unstoppable, so let them find ways to add elements to the room.
12. I spy clouds: If it's a nice day, take them out and play "I Spy" with the clouds. Find as many silly and quirky shapes with the clouds as you can and encourage them to do the same.
13. Good ol' time capsule: The shoebox becomes useful once again! Find stuff around the house that can be stored to be found "hundreds of years later".
14. Works of art: Dried noodles and popsicle sticks can be made into houses, picture frames, and a zillion more things! Ask what he/she wants to make, and help them create it out of it.
15. Create a construction site: If your kid has an assortment of diggers, trucks and cars, all you will need to create an awesome construction site is a big cardboard box that serves as the site, and diverse props such as sand, rocks, grass and maybe even some mud to create some pretend cement.
You can easily recreate this in a big cardboard box!


16. An alphabet tour: Perhaps I was way too nerdy, but I loved this as a kid! The idea is that you play with your kid to see who is the first one to find an object that starts with the letter 'a', then 'b', 'c' and so on. Educational and plenty fun!
17. Hopscotch: Another oldie but a goodie! If you don't have chalk, you can create the hopscotch out of lined-up pencils or whatever else you have on hand (which makes it great if you are indoors, too!).
18. Egg race: The classic! If you don't want to waste any eggs, little balls will do too. Put them on a spoon and race away!
19. Toilet paper rolls: Oh the possibilities! Binoculars and telescopes, for example. Or why not some cute bunnies or perhaps a castle? I think my favorite one, however, is this awesome car!
20. The Dress-up Box: Gipsies, fairies, pirates... they can all come to life with a few garments and a lot of imagination!

These are only some ideas that have provided hours of fun with my kiddo without having to spend any significant amount of money. The best part is I found that these activities aren't only cheap and easy, they are also very educational as they encourage lots of creative thinking!

On the next rainy day, stuck at home, be sure to come back to this list instead of gluing your kid to a screen and I guarantee you'll both have a blast!


 photo Footer_zps0751fb70.jpg

Wednesday, January 15, 2014

Sean's Wednesdays v.1: Chocolate Rocks

I am very, very excited to present to you my new series: Sean's Wednesdays!

I have mentioned before that Sean is an excellent cook: he loves creating yummy dishes, scrumptious desserts and sophisticated cocktails. He truly is a kitchen whiz (or maybe it just seems to me that way because I am hopeless at it, but stay with me). Imagine my delight when last week, while sharing a pizza, he informs me that he would love to be a contributor to my blog, with a weekly food and drink segment! My own hubby wants to be a part of my blog! I am so proud!

So without further ado, let's welcome Sean, a great cook and even better man. Every Wednesday he will share something delicious here on the blog for your tasting pleasure, starting today with this awesome cocktail recipe.

Hi, guys, Sean here.
First off, this is a cocktail that is so versatile and easy to throw together! It's shaken in this demonstration, but you can also just build it in a tall glass.

First you will need:

- Ice
- Bailey's
- Rum Cream (Can be Kahlua or Frangelico or another Irish cream of your choice)
- Milk
- Chocolate sauce
- Liquid Honey
- Cocktail shaker (or any substitute)


First, take your shaker and add ice. Then pour about 30 - 40 mls (1 - 1.3 oz) of the Rum cream followed by 45 - 60mls (1.5 - 2 oz) of the Bailey's. Add honey and shake for a few minutes to chill the mix.


Take your glass and gently add chocolate sauce to the inside of the rim of the glass, rotating it slowly. Now pour the mixture from the shaker and add milk to where the chocolate circles the top of the glass.


Give it a little stir to finish it off. Feel free to add whipped cream or more chocolate sauce, or why not sprinkle some chocolate chips on top!


Serve this on a hot Summer afternoon or grab a sneaky mug of it at brunch. A great hit for entertaining is serving it in a large pitcher and share with some friends. And if it is cold where you are, you can try a hot version too! (just hit up the milk, and it's done!).

I hope you enjoyed this first Sean's Wednesday and feel free to suggest any of your favorite drinks and recipes for upcoming posts!


 photo Footer_zps0751fb70.jpg

Tuesday, January 7, 2014

Homemade Scented Candles

For Christmas, my very DIY-oriented mom gave away some stunning scented candles to friends and family. I thought they looked stunning, and since I am pretty much obsessed with scented candles, I had to ask her to teach me. As it turns out, it is not at all difficult. To make them, you will need:
  • Tin or pot
  • Liquid paraffin (the amount depends on how big your tin/pot is)
  • The fragrance or essential oil of your preference (Lavender, Cinnamon, Vanilla, Lemongrass... whatever you want your candle to smell like)
  • Poppy paint (optional)
  • White paint and any other color you wish to use
  • A strong cotton cord or string for the wicks
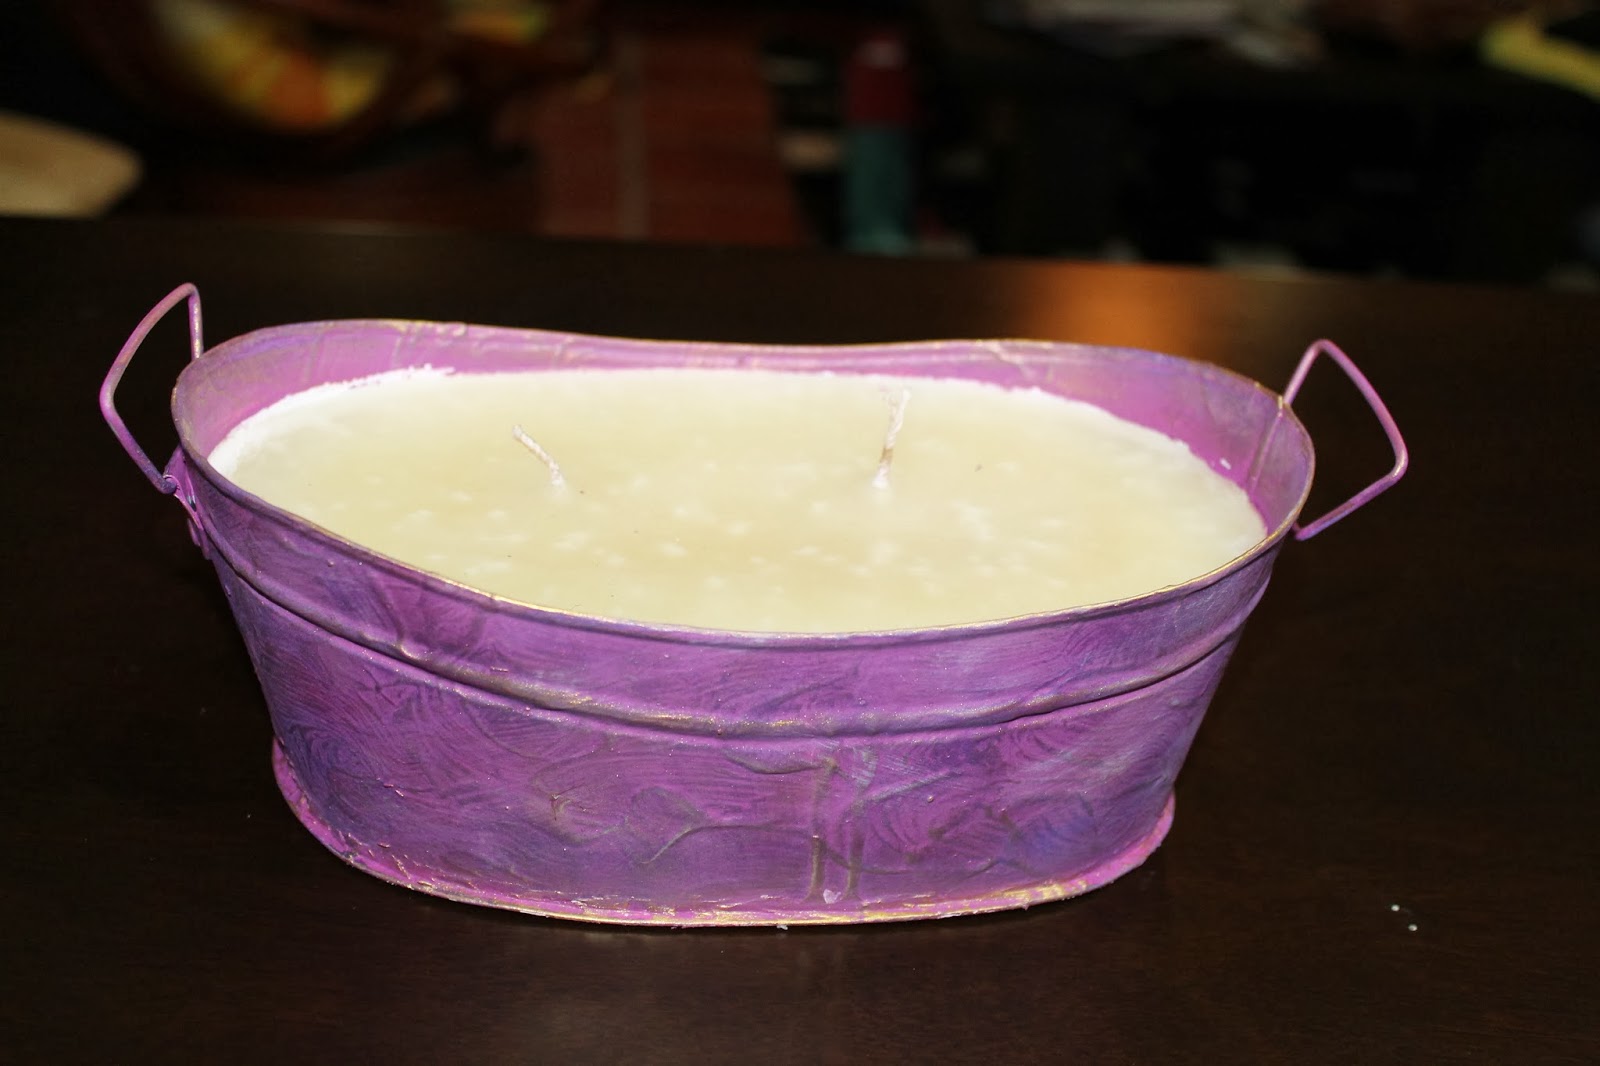
The first thing you'll need to do is paint your whole tin white, to even out the surface and to make the rest of the paint look brighter and stick better to the tin. At this point, you can choose to make some designs with poppy paint in order to give it more texture. Another technique she taught me for texture (shown in the picture below) is to dip your brush in the white paint and then wipe it until the brush is almost dry. Then paint the tin with several, irregular strokes in different shapes until it is all covered.


Once it has fully dried, it's time to create the actual candle. First, you'll need to make sure that your wicks stand straight once the candle is finished: what I do is stick the cords to the bottom of the tin with a little ball of play-doh, and I hold them up, looping the ends (which will become the wicks) around a pencil or some long stick, ensuring that the wicks stay in place. For big tins, I like making three wicks for a better throw.

Now, pour the paraffin and the fragrance oil into the tin. Let the paraffin solidify over a good 24 hours. 
Once the paraffin is solid, trim the wicks to your desired length (1/2 inch or so is a good standard).


Now it's time to get creative: paint your tin however you want: personalize it with a nice message for someone, comforting words (like my mom did), or even write your favorite quote on it. The sky is the limit here!


Love, Peace, Faith... encouraging words and hearts make this a gorgeous candle


And then there's this one, made for me and Sean with our wedding details on it:


Everyone who received these candles for Christmas was absolutely delighted. But since the Christmas season is over now, why not make some to put around in your house? They will certainly add a lot of character and are quite the conversation starters. 


Monday, December 16, 2013

10 DIY Holiday Gift Ideas For Kids


Kids can go crazy at Christmas. Some of them ask for a real pink pony, some ask for less specific stuff, such as something that can turn into anything at anytime (true story!). At this time of year, many parents find themselves in trouble trying to fulfill their kid's not-so-rational desires (and even less rational ideas of where to fund said desires from). To the rescue I come, with a list of links (because, let's face it, I'm not that creative) that will provide you with easy, affordable, and super awesome gift ideas for the littlies in your life:

1. DIY Art Easel: Remember the girl who wanted something that can turn into anything, her parents can get away with this! She wants it to be a pet? draw a little puppy! two minutes later she wants it to be the whole American Girl doll collection? erase and get drawing again. Solved!

2. DIY Heart Hair Clip: The ultimate stocking stuffer for little girls. We all love 'em.

3. Glitter Playdoh: You just can't go wrong with this.

4. DIY Train Table: This is a great way to upcycle some old furniture. My own son would adore this!

5. Buzz Lightyear Jetpack: Easy and cheap to make, and sure to be a hit!

6. Kitchen Set: What a great gift! And you get brownie points for upcycling instead of buying a plastic set!

7. Angry Bird Hooded Towels: Going for the win!

8. Kids Sleeping Bag: An outdoorsy kid will think this is the best present ever!

9. Glitter Flats: If you can only afford some basic, plain flats, make them an awesome gift by adding glitter to them, and make a girl's day!

10. Sock Monkey: Fisher Price toys are great and everything but they are so pricey and so much plastic! Nothing beats making the special kids in your life something from the heart, such as this adorable monkey!


So there you go. Kids are going to get a million toys from everyone, so why not be a little different and give them something more personal? I have already started making the easel for my son (photos to come), and will probably continue with the Buzz Lightyear Jetpack (the kid bloody loves it!). Not only will you probably save money, but those types of gifts are the most memorable ones.


Tuesday, December 10, 2013

Two Decadent Chocolatey Treats In A Mug

Because (at least for me) some of the best things in life come in a mug...


1. MUG CHOCOLATE CAKE
A couple of years ago, I was just mindlessly scrolling down my facebook feed, and suddenly stumbled upon a mug chocolate cake recipe that rapidly became a huge hit at home. It was soooo good that even my fiancé asked me to make it for him (I mean, for him to ask me to make something for him, it must be darn good!).

There are plenty of recipes for mug cakes out on the Internet, but this one is the best one I have seen by far. The cake is spongy and rich and delicious, and you simply don't want to miss it!

I must add a warning at this point, and add that if you want to keep reading, I will not be held responsible for any weight gain, insatiable cravings or sugar overdose that might occur as a result. Yes, it is that good. After I made it the first time, I kept making it over and over again, until I had to stop myself from buying the ingredients because you know, the cake is lovely and all but not worth gaining five kilos... (two or three, sure! not four...)

To make one cake you will need:

- 4 tablespoons flour
- 4 tablespoons sugar (I used brown sugar, as I like it better, but white is fine too)
- 1 tablespoon unsweetened cocoa
- 2 tablespoons whisked egg (optional; not adding it makes the cake fudgier)
- 3 tablespoons milk
- 3 tablespoons oil
- As many or as little chocolate chips as your taste buds desire (or substitute for chunks of chocolate)
- The flavoring of your choice (for me, it's vanilla. But you can get creative here, and maybe add some cinnamon or peppermint, or whatever you'd like!)

(Ok, so now you see why you should only make this recipe 1-2 times a month? 3 tablespoons oil and 4 tablespoons flour? yea, not what you'd call light).

Add the flour, sugar and cocoa to the mug, and mix. Add the whisked egg and combine until you get a pasty texture, and then pour the milk and the oil. Add the chocolate chips or chunks and your flavoring.


Put in the microwave for around 2:30 minutes (but keep an eye on it, if it starts spilling out of the mug, stop the microwave). It will be super hot so make sure you wait for a few minutes before grabbing a spoon and digging in!


This recipe takes literally five minutes (including microwave time) and no cooking skills whatsoever (one of the main reasons I love it!). It also fits perfectly with this time of the year, don't you think? If you are not exactly a master of the kitchen, like me, then give this a try and impress more than one!


2. S'MORES HOT CHOCOLATE
This recipe comes courtesy of MissGlamorazzi, a YouTuber whose videos I love watching. Last week she made this absolutely decadent S'mores Hot Chocolate, and I just had to make it. The only variation I did was to substitute the peanut butter for a caramel spread, since I don't really like PB (yes, yes, I know...!)

You will need:
- 2 Tablespoons of cocoa
- 1 cup of milk
- 1 tablespoon of sugar or sweetener (if you are using unsweetened cocoa)
- Peanut butter (or a caramel spread if preferred)
- 2 or 3 Graham crackers
- Marshmallows (as many as desired)
- Chocolate chips and/or chocolate sauce (optional - but highly recommended!)

First of all, put the milk in a saucepan and heat on medium. Mix the cocoa and the sugar in a bowl, and pour into the saucepan. Stir until the lumps of cocoa have dissolved, and turn the heat to low so the chocolate remains warm.


Cover the rim of your mug with the PB or your preferred spread, and crush the graham crackers (a great tip is to put them inside a Ziploc bag, seal it so the crumbs don't go everywhere, and start crushing!). The finer you crush them, the better. Put the crumbs on a plate, and put the mug upside down over the crumbs, so that they stick to the rim.


Pour the hot chocolate into the mug. Toast your marshmallows with the heat of the oven (carefully!) and drop them in the mug, along with as many chocolate chips as you want or some chocolate sauce, to make it even more decadent. Watch the marshmallows slowly melt, and enjoy!


Which recipe do you prefer? Which one can't you wait to try out?


Monday, December 2, 2013

DIY Advent Calendar

December has officially started, and with it the holiday season has now begun in full force. I love seeing the streets fill with lights, seeing Christmas trees everywhere I go, and even listening to carols. Ever since I was little, the holidays have filled me with such joy, and I get all giddy with the excitement and the good energy this time of the year brings. 25 years old and I still enjoy Christmas like the next kid. My 3-year-old is now a lot more aware of the festivities, too, and therefore excited about what's to come, so I set out to find something special and meaningful, something to start creating magical memories for him about this time of the year.

That's when I suddenly started seeing hundreds of DIY advent calendars popping up on my social media feeds, such as herehere and here. Even though I am not very crafty, I was adamant that I wanted to recreate them and make my own calendar for him. It is definitely not as pretty as the ones you'd find at the store, but there was something so special about sitting one afternoon with Sean and making this for our kid. It made me really proud when it was finished, and I couldn't wait for Tommy to start opening the little pockets (most of them are little chocolates or candy, some are other small surprises).


Making it was easier than I had envisioned, and it only required some wrapping paper, some sort of cord (twine is great, but if like me, you only have wool available, that works too!), and somewhere to hang the pockets from (we just went downstairs and grabbed a branch!). From there, it was only a matter of wrapping the little presents and hanging them from the branch. It doesn't get any simpler than that (although it could get a little prettier haha). I'm certain Tommy will enjoy it as much as I am, and hopefully this can be something that we do every year.

Here's to hoping that your holidays are filled with laughter, love, compassion, smiles and lots of yummy yummy food!
Do you have any special plans for the holidays?  what is the most meaningful holiday tradition you have?


Related Posts Plugin for WordPress, Blogger...