HOME Home About Subscribe Features FAQ Beauty Fashion Lifestyle
Showing posts with label Food. Show all posts

Friday, February 28, 2014

Friday Roundup: Food For The Stars

You might belong to the group of people who know the Oscars are this Sunday, and who love watching the whole thing and delighting over all the drool-worthy dresses. Or, you might belong to the group of people who love eating nice things from time to time. Or perhaps you just simply love to amaze your friends and family by creating something awesome in the kitchen. If any of these apply to you, then keep reading, because here I present to you a carefully curated selection of delicacies related to that tiny little event happening in two days' time:


1. STARS EVERYWHERE! from NotMartha
What could be more appropriate than food adorned with stars for a night full of, well, stars?


2. FORTUNE COOKIES COVERED IN GOLD GLITTER  by LaurenConrad.com
Nothing says Oscars and glamour like gold glitter!


3. POPCORN CUPCAKES by Sarah Scoop
Popcorn for the Oscars is pretty self-explanatory (if not mandatory), and in cute little cupcakes? yes please!


4. OSCAR CUPCAKES by Hoosier Homemade
And even more cupcakes, for your tasting pleasure.


5. OSCAR STATUE COOKIES by Bakerella
How incredibly perfect are these!? I would almost feel bad about eating them (almost!).


6. BLACK TIE PARFAITS by Lifetime Moms
If you want something very different, elegant, yet easy at the same time, these parfaits are what you're looking for.


7. TUXEDO STRAWBERRIES by Ziplist
The finishing touches of these simple strawberries really take them to the next level.


8. BONUS VIDEO: OSCAR-RELATED COCKTAILS! By Martha Stewart
Because let's face it, no good party would be complete without a proper selection of cocktails, now would it?


Your turn now: are you planning on really knocking it out of the park on Sunday with some of these creations? Or are your plans leaning more towards the cozying up in bed with a big tub of good ol' Ben & Jerry's? (I may or may not be thinking to do just that....!)

P.S.: keep your eyes peeled and stay tuned, because there might just be another Friday roundup coming your way today... to make up for last week's one, and I felt like it was only fair to do two posts in one day after not posting for two days in a row.

 photo Footer_zps0751fb70.jpg

Wednesday, February 5, 2014

Sean's Wednesdays v.4: Mini Caramel Brownie Cakes

Hi again, everyone!

Today I want to tempt all your pallets with this scrumptious dessert recipe. Anyone can make brownies, yes, but it's little tricks and touches that take a brownie from "good" to "Holy crap, when did I eat 5 of these!!?". And this, my friends, is the recipe that gets the job done.


To make approximately 12 brownies you will need:
- 350gr dark chocolate (about 1 1/2 big bars). I personally used medium-dark as I like it better.
- 1 1/4 cup all purpose flour.
- 5 tablespoons cocoa powder.
- 1 3/4 cup brown sugar.
- 6 eggs (4 full eggs and 2 yolks)
- 1 cup butter
- 1 teaspoon vanilla extract
- Caramel spread  (optional -- but highly recommended!)

NOTE: I made my mini cakes in little muffin moulds to give them more of a "cake" feel. I had some leftover batter that I then put into a little cake mould. However, feel free to use whatever baking dish or mould you have on hand!

Firstly, put the chocolate and the butter together in a bowl. Put the bowl inside a saucepan of boiling water. Stir until melted.

Next, turn the heat off. Add the brown sugar and blend everything together. Now remove the bowl from the element and add your vanilla, eggs, and egg yolks while stirring softly.


Pour your mixture into the mould, but only half. Put a dollop of the caramel spread on top of the mixture, and then top off each muffin mould.


Bake in the oven at 350º F (or 180º C) for approximately half an hour. Check regularly, though, to ensure they aren't burning!


When ready, take them out and let them cool.
That's it, enjoy!

Hope you liked this very 'sweet' rendition of Sean's Wednesdays. Stay tuned!


 photo Footer_zps0751fb70.jpg

Wednesday, January 29, 2014

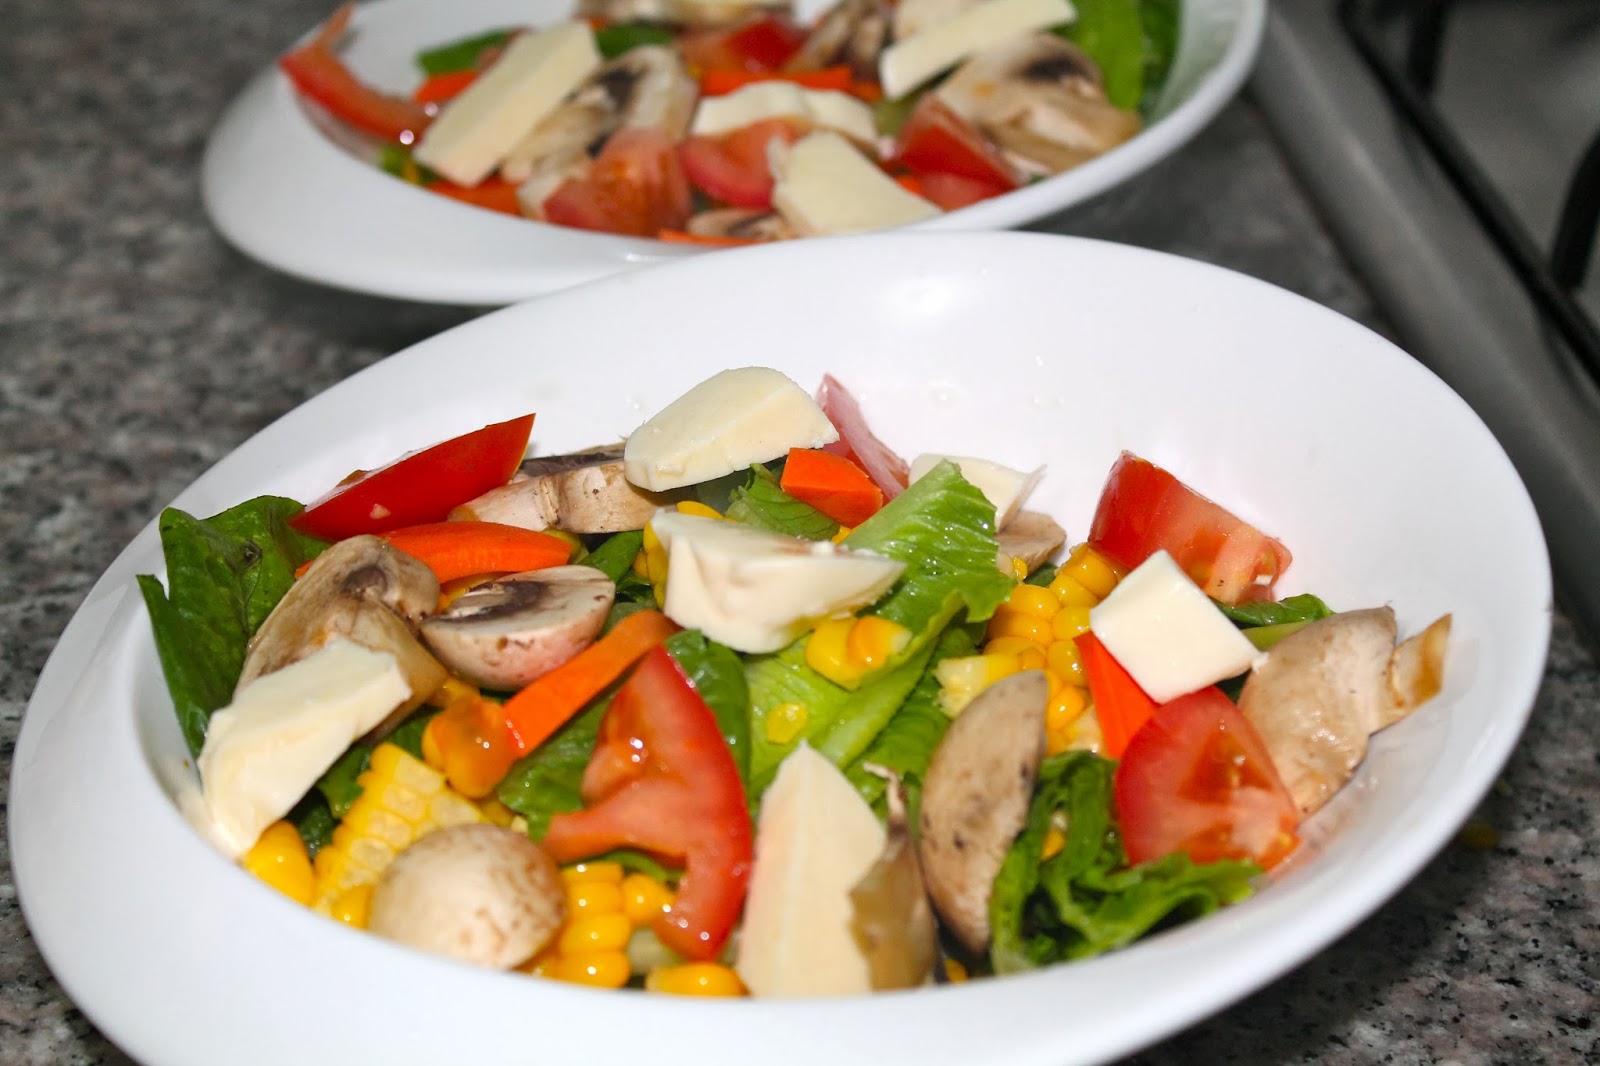
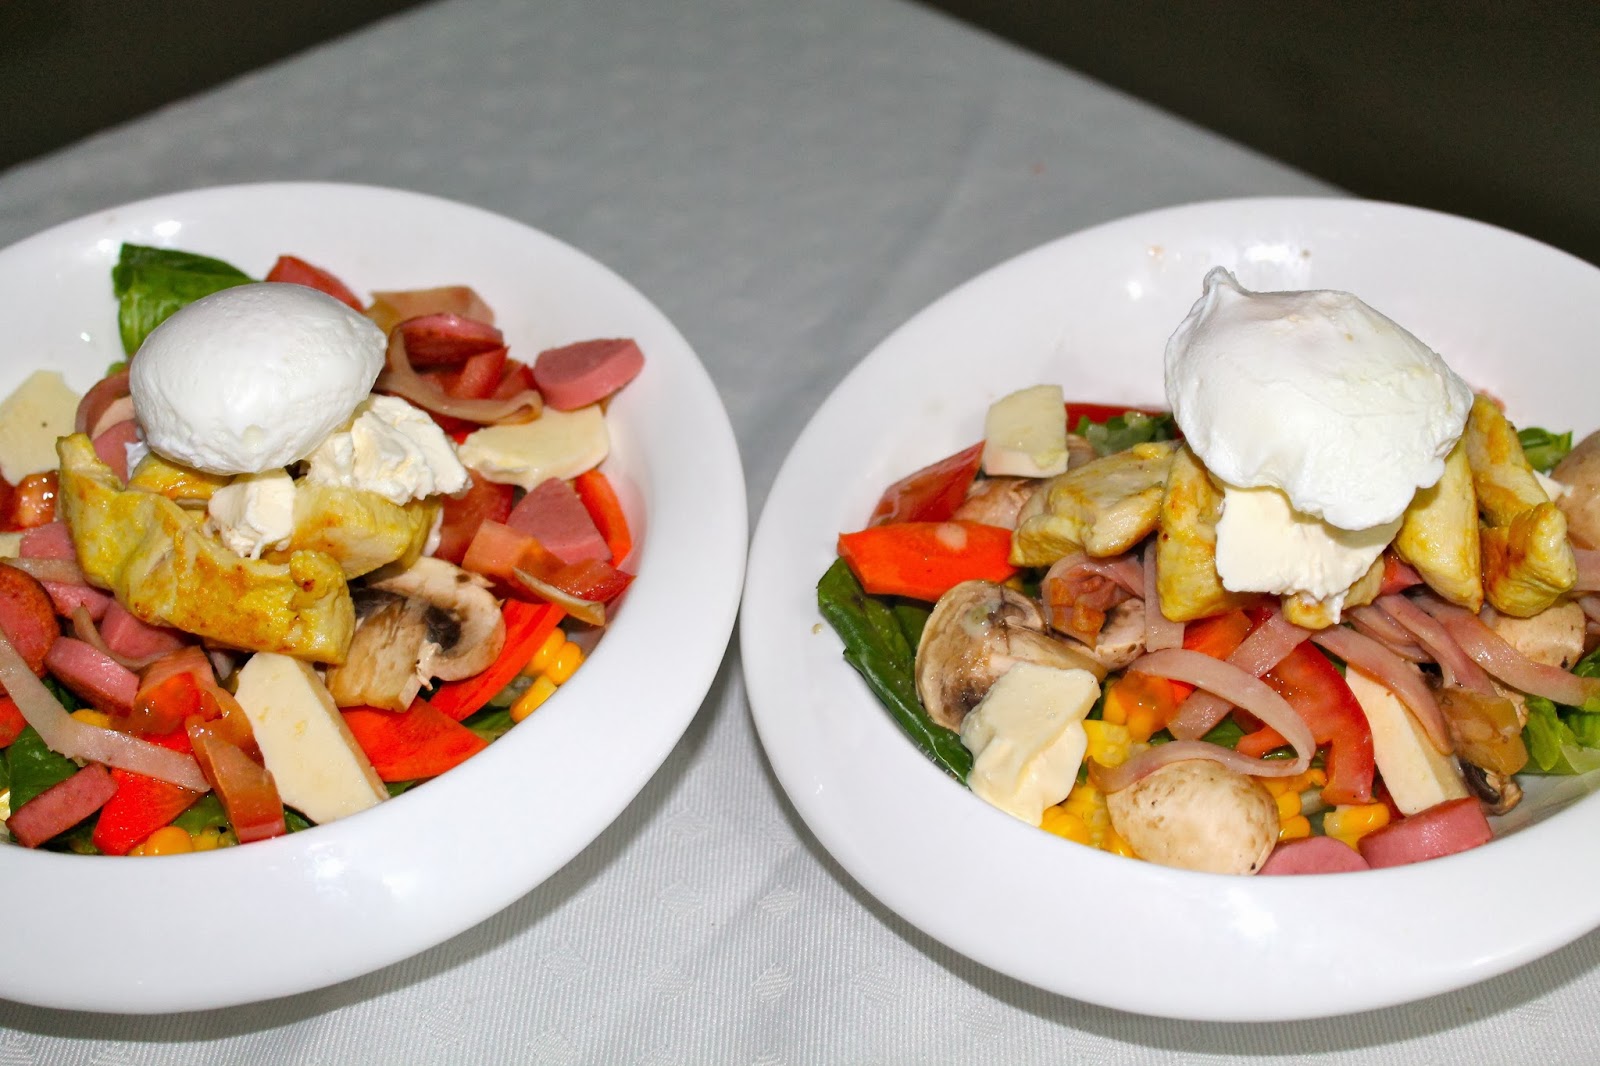
Sean's Wednesdays v.3: Caesar Salad With A Twist

Welcome guys to another rendition of Sean's Wednesdays. Today I'm making a super easy but very delicious salad. It literally is extremely simple to put together AND will provide your five-a-day! Perfect for a quick, healthy, yet yummy lunch when you are on the go!

For two people you will need:
- Baby lettuce leaves
- 1 Tomato
- 1 Carrot
- 1 Cup of Corn
- 1 Cup of Mushrooms
- 2 Eggs
- The dressing of your choice (we used regular vinaigrette, but any dressing will work!)
- 2 Slices of Ham (optional)
- 2 Sausages (optional)
- 200 grs. of chicken
- Cream cheese (optional)
- Mozzarella cheese. (If you have Edam, that works too!).

NOTE: The best thing about this salad is that it is very versatile! To make it much healthier, just skip the ham, sausage and cream cheese and substitute the Mozzarella for feta cheese.

The first step is to prepare all your vegetables: wash, chop, dice and slice them. Once they are ready, toss in your serving bowl and add the Mozzarella.


Get two frying pans a pot full of water burning on the stove. Have the pot full of water on high and the pans on low. When your water comes to a boil, poach your eggs in it turning the temperature down to medium. While your eggs are poaching, fry your chicken in one pan and the ham and sausage together in the other with just a dash of olive oil. At this point, dress your salad with your chosen dressing.
Once you make sure your meats are cooked thoroughly, spoon the chicken onto the center of the salad, sprinkling the ham and sausage around the chicken.


Once your egg is cooked, put a teaspoon of cream cheese in the salad and place your egg on top. Season with a bit of salt and voila!


I hope you guys enjoy it, and I look forward to hearing what you guys want to see for the next Sean's Wednesdays.
See you next week!
Sean


 photo Footer_zps0751fb70.jpg

Wednesday, January 22, 2014

Sean's Wednesdays v.2: Bacon & Egg Breakfast Pies

Hello, everyone!

Sean here, with another treat for your pallets!

Bacon and Egg Breakfast Muffins

If you prefer to make your own dough, or don't have a store-bought dough available, here is a recipe for you:

Ingredients:
- 300 gr flour
- 130 gr butter
- 2 tbsp water
- 1 tsp salt

Mix the ingredients into a ball, and set in a fridge for 15 minutes. I prefer to pinch some sugar into the mix too but each to their own.

Once the dough is made, you will need to make the filling and prepare the pies, for which you will need:

For each pie:
- 1 egg
- 1 tbsp milk
- 2 mushrooms
- 150 gr bacon (or substitute for spinach, for a vegetarian option!)

Step 1: On a chopping board, prepare your bacon and mushrooms and have your dough on standby.


Step 2: Take some of the dough and roll it out on the surface. Evenly use a rolling pin to stretch the dough out into thin circles of 15cm (6 in). Press the dough into the mould carefully and try not to rip the dough as you get it into the corners. Get your eggs and break them in together with 2 tablespoons of milk and stir.


 Step 3: Light up a stove and fry your bacon and mushrooms in a pan with a dash of olive oil and sea salt. Fry off for no more than 3min and remove from the pan directly into your egg mix in the pastry mould.


Step 4: Roll out a separate piece of the dough as a lid, make sure its flat and thin.


Step 5: Firmly place the top on and pinch the sides before putting the pies in the oven.


Step 6: Once in the oven, baked for 15 to 20 minutes. Take them out and let them cool.


Final Step: Please make sure they are cooled before you take them from the mould. Oh, and lift the lid to peek at the egg to make sure its cooked.

I hope you enjoyed this recipe and remember that there will be something delicious coming your way every Wednesday, so stay tuned!


 photo Footer_zps0751fb70.jpg

Friday, January 10, 2014

Pinterest Roundup Of Deliciousness

I did this once before, posting my favorite brownie recipes sourced from the awesome universe that is Pinterest. Now, I want to do it again, only because I have a major chocolate craving right now, and nothing makes it stronger than going on Pinterest and finding hundreds upon hundreds of delicious stuff.

There is no specific topic for today: it is a roundup of the most delicious gain-a-pound-just-by-looking-at-them things I have stumbled upon lately.

Disclaimer: If your New Year's resolution was to lose a few pounds, you might just want to stop reading right now (I don't want to be responsible for you not keeping it. That is Ben & Jerry's job). My resolution was to enjoy myself more, so there's that...


1. Banana Chocolate Enchiladas
Oh, my stars! At the hotel in Mexico, they sometimes had these for dessert and we both became obsessed with the stuff!  For some reason I had never tried them before, and I was delighted to find out just how easy they are to make. Friday night stay-at-home date sorted!


2. Oreo Mousse
I would not share this. Seriously. If I ever get my hands on something like this, you can bet I am eating all of it! (Why gain so many calories and not even enjoy it all, am I right!?)


3. Chocolate Lasagna
I love lasagna and I love chocolate. This is a match made in dessert heaven!


4. Nutella Crescent Rounds
I may or may not have had two croissants completely drowned in Nutella for breakfast every day last week and may or may not be experiencing some withdrawal syndrome... (my husband forbid me to get any more Nutella for at least a couple of months after that  :(  but at least I know what I'll be making when I'm allowed it again)  *looks around in shame*


5. Snowman Cupcakes
Snowman season is anything but over in the Northern Hemisphere, so for those of you who are there, enjoy it with these yummy treats. For those of you melting in the heat (*raises hand!*), there's no rule that says you can't pretend it's winter!


6. Caramel Apple Crisp Cheesecake
'Nuff said (and shown!)


You are welcome! Enjoy!
Let me know if you end up making any of these... There's no question as to which one I'm making first (banana enchiladas!). I will try and do a follow-up post with some photos of how they turn out (no doubt not as perfect as the pictures!) but as long as they taste good that's fine, right?


Tuesday, December 10, 2013

Two Decadent Chocolatey Treats In A Mug

Because (at least for me) some of the best things in life come in a mug...


1. MUG CHOCOLATE CAKE
A couple of years ago, I was just mindlessly scrolling down my facebook feed, and suddenly stumbled upon a mug chocolate cake recipe that rapidly became a huge hit at home. It was soooo good that even my fiancé asked me to make it for him (I mean, for him to ask me to make something for him, it must be darn good!).

There are plenty of recipes for mug cakes out on the Internet, but this one is the best one I have seen by far. The cake is spongy and rich and delicious, and you simply don't want to miss it!

I must add a warning at this point, and add that if you want to keep reading, I will not be held responsible for any weight gain, insatiable cravings or sugar overdose that might occur as a result. Yes, it is that good. After I made it the first time, I kept making it over and over again, until I had to stop myself from buying the ingredients because you know, the cake is lovely and all but not worth gaining five kilos... (two or three, sure! not four...)

To make one cake you will need:

- 4 tablespoons flour
- 4 tablespoons sugar (I used brown sugar, as I like it better, but white is fine too)
- 1 tablespoon unsweetened cocoa
- 2 tablespoons whisked egg (optional; not adding it makes the cake fudgier)
- 3 tablespoons milk
- 3 tablespoons oil
- As many or as little chocolate chips as your taste buds desire (or substitute for chunks of chocolate)
- The flavoring of your choice (for me, it's vanilla. But you can get creative here, and maybe add some cinnamon or peppermint, or whatever you'd like!)

(Ok, so now you see why you should only make this recipe 1-2 times a month? 3 tablespoons oil and 4 tablespoons flour? yea, not what you'd call light).

Add the flour, sugar and cocoa to the mug, and mix. Add the whisked egg and combine until you get a pasty texture, and then pour the milk and the oil. Add the chocolate chips or chunks and your flavoring.


Put in the microwave for around 2:30 minutes (but keep an eye on it, if it starts spilling out of the mug, stop the microwave). It will be super hot so make sure you wait for a few minutes before grabbing a spoon and digging in!


This recipe takes literally five minutes (including microwave time) and no cooking skills whatsoever (one of the main reasons I love it!). It also fits perfectly with this time of the year, don't you think? If you are not exactly a master of the kitchen, like me, then give this a try and impress more than one!


2. S'MORES HOT CHOCOLATE
This recipe comes courtesy of MissGlamorazzi, a YouTuber whose videos I love watching. Last week she made this absolutely decadent S'mores Hot Chocolate, and I just had to make it. The only variation I did was to substitute the peanut butter for a caramel spread, since I don't really like PB (yes, yes, I know...!)

You will need:
- 2 Tablespoons of cocoa
- 1 cup of milk
- 1 tablespoon of sugar or sweetener (if you are using unsweetened cocoa)
- Peanut butter (or a caramel spread if preferred)
- 2 or 3 Graham crackers
- Marshmallows (as many as desired)
- Chocolate chips and/or chocolate sauce (optional - but highly recommended!)

First of all, put the milk in a saucepan and heat on medium. Mix the cocoa and the sugar in a bowl, and pour into the saucepan. Stir until the lumps of cocoa have dissolved, and turn the heat to low so the chocolate remains warm.


Cover the rim of your mug with the PB or your preferred spread, and crush the graham crackers (a great tip is to put them inside a Ziploc bag, seal it so the crumbs don't go everywhere, and start crushing!). The finer you crush them, the better. Put the crumbs on a plate, and put the mug upside down over the crumbs, so that they stick to the rim.


Pour the hot chocolate into the mug. Toast your marshmallows with the heat of the oven (carefully!) and drop them in the mug, along with as many chocolate chips as you want or some chocolate sauce, to make it even more decadent. Watch the marshmallows slowly melt, and enjoy!


Which recipe do you prefer? Which one can't you wait to try out?


Wednesday, December 4, 2013

Homemade Mickey Mouse Chocolate Chip Cookies

'Tis the season to eat yummy!


Baking cookies is one of those things that I hardly ever do, but when I do do it I love it, and end up wondering why I don't do it a lot more often. Of course, help from my fiancé is pretty much required, as God knows how they would turn out if he didn't (oh look at that, I know too: not too good!).

He is a second grade teacher, and last week we were discussing what he wanted to give his students as a little treat for the beginning of the holidays. I mentioned that baking some cookies would be nice, and that is exactly what we set out to do. I started researching recipes, and was finally inspired by these from Bakerella. They include pecans (which I hate) and sprinkles (which we didn't have at the time), so we didn't add those. We also substituted the chocolate wafers she used in that recipe for regular chocolate chips.

We made enough for his class and of course for us, and even though they didn't look particularly stunning, they tasted pretty darn good, so I was satisfied.

The ingredients you will need to make 24 of these are:

  • 1 1/2 cups flour
  • 1 tsp baking soda
  • 3/4 tsp salt
  • 1 cup softened butter
  • 3/4 cup sugar
  • 1 cup brown sugar
  • 2 tsp vanilla
  • 2 eggs
  • Whatever additions you want to add (license to get creative here!). I only used m&m's and chocolate chips. You can use whatever you have handy.

First of all, mix the flour with the baking soda and the salt. Take the butter and the sugars and cream them together:


When the texture is fluffy, add the eggs and the vanilla, and combine. Take the flour, baking soda and salt mixture and add it. When combined, add your toppings:


Let it chill for about half an hour. Preheat your oven to 350 ºF (or 180 ºC). Scoop the cookies onto baking paper, and let them bake for around 15 minutes (but be careful! some ovens take shorter, like mine... I got a little distracted and almost burned them, so just make sure you are keeping an eye on them!).


After making the first batch, we realized we have a Mickey-shaped cookie cutter lying around (goes to show how often I bake cookies!) that we got when we went to Disneyland last year. Tommy was so excited to eat the "Mickey cookies"! They could have tasted awful and they still would have been a hit with him. Oh, and Sean informed me that his students loved them too, so I am definitely calling them a success!

***The reason there weren't too many m&m's may or may not be because I had a mouthful or two before baking***

All in all it was quite the nice Sunday afternoon activity. I was left with the desire to keep baking fun little treats during the Christmas time. It just feels like that is what super moms do, you know? I have the impression that all the great moms out there are great at baking (just me?) and I really want to incorporate that into our lives. Who knows? maybe I'll become the kind of mom that when my kid brings a friend over I just come out with baked goodies for them... I think that makes for great memories. And, well, if the cookies don't turn out that good, it makes for great stories, so what's there to lose, right?


Wednesday, November 13, 2013

Mid-Week Pick-Me-Up

It is the middle of the week again, that time when we start to feel that Friday is taking forever to come. But since this blog is all about the glass-half-full approach, I thought I'd share some things I am loving right now. Finding new things that you like, that are cute or funny or interesting, is a surefire way to make the day easier and brighter, so here is my list:

1. Elephant Slippers: there is no cuter way to keep your feet warm during the colder months.


2. Kim Kardashian's latest pic of North West: those cheeks you guys!


3. This Beautiful Bohemian Necklace: from Roots and Feathers


4. A Stoneware Piggy Bank: tell me this isn't the cutest piggy bank you've seen today!


5. 3D Graffiti art on the street: mind blown!


6. Reminder that life is beautiful. Always.: it never hurts to have this handy when you are going through a tough time. There is always something beautiful in your life to hold on to.


7. This Eric Thomas Quote: I pinned it months ago, and I recently remembered it and went back to read it. Sometimes it feels like a long and hard journey towards achieving your goals (it is!) but keeping in mind that it will pay off is the way to ensure it does. The best things in life are never easy (I know, I know, I am a living cliché).


8. Mouthwatering French toast with Nutella and strawberries recipe: aaaand... now I'm hungry!


9. And last, (but most definitely not least!) these two guys that set my heart aflutter:


Related Posts Plugin for WordPress, Blogger...