HOME Home About Subscribe Features FAQ Beauty Fashion Lifestyle
Showing posts with label Decor. Show all posts

Thursday, June 26, 2014

Decorating My New House v.1: My Perfect Vanity

Okay, so I know I have been super inconsistent in my posting the last couple of weeks.. but this time I do have a legitimate excuse: I moved! not only houses, but cities, too. And jobs. And I am so very, very excited because I am now living by the sea, in a city I absolutely adore, where many of my very best friends live. However, moving can be such a pain! Packing everything up, arranging movers, unpacking everything again and arranging it... it can get a bit overwhelming at times (and it did!). So instead of letting myself be swamped by a huge to-do list, I decided to focus on the best part: decorating my house from scratch!

Being the beauty hoarder that I am, the first thing I wanted to sort out was my vanity. At my old place I didn't have the room to set a space just for me, where I could keep all my products organized and nicely stored, so when I started house-hunting I specifically looked for a space where I could arrange a gorgeous vanity to fit my needs. My needs being:

1. Sufficient room for all my beauty products.
2. Lots and lots of light (have you ever done your makeup in the dark, only to realize you resemble a drag queen once you have left the house!? not me, definitely not, never, no sir!).
3. Vintage inspired, yet not grandma-y, to match the vibe of the rest of our house.

When I was contacted by One Kings Lane, I was delighted to see that they had a ton of awesome stuff in a huge variety of styles and price ranges, and I let myself go wild looking for all the things I need to create my own perfect vanity. Fun, fun, fun! If you are wanting to update your own vanity, or add some nice touches to the one you already have, you will almost certainly find something there to fit your own style and budget. After some browsing around, here is what I ended up loving the most for my new space:


1. Vevey Oversized Mirror: In my opinion, the best way to start designing your vanity is with your mirror. A huge statement mirror will set the tone for the rest of the vanity, and you can then keep decorating around it. My favorite one from their site is this wooden one. I love the shape and color, which give it a vintage feel, but the wood counteracts its effect so it doesn't look outdated. And of course, by being oversized (29" x 45") it doesn't need a lot more to make a statement. And it brings in lots of light, too. Basically, it ticks all the boxes for me. For even more inspiration on how to make the most out of your mirror, I found this great list of 7 Ways to Work Magic with a Mirror. It is well worth a read!

2. Roland Table Lamp: I am in love with the texture of this lamp. I think it adds personality to it, while the white cotton shade keeps it sleek and clean. It also pairs perfectly with the mirror! Can you tell by now that I love things that have a lot of contrast to them? I find them so much more interesting!

3. Trellis Frame: I like the elegant feel of keeping my vanity light and neutral with some gold accents, but I still think it's fun and fresh to add a pop of color. My choice is this too-cute frame in teal, perfect to keep a picture of my boys right beside me when I'm doing my makeup. I love it a lot.

4. Apothecary bottles with gold accents: I love the old-school vibe of apothecary bottles, but sometimes they might be a little too old looking for my taste. But then I saw this chevron one and the polka-dotted one and they were exactly what I wanted to complete my vanity! Again, they are super contrasty: old bottles with modern golden accents? yes, please! I'm thinking I will put some fresh flowers in it because I love that it's kind of unexpected, not to mention fancy and sophisticated, no?

I am really happy about these four choices, I think they fit my personality and the rest of my house to a t, and I am super excited to have such a nice space to get ready every day. What about you? Do you also have a nice little haven all of your own in your home? I would love to hear about it!


This post was created as part of the "Reflect Your Style" campaign, together with One Kings Lane. 
All opinions expressed here are my own.


 photo Button1_zps4b1eff04.png

Monday, April 21, 2014

Vintage Decor Tips From Grandma

Last week we stayed at my grandma's place for the whole week (hence why I hadn't blogged for what feels like ages!). There is a fine line between a beautiful vintage vibe, and a dated, obsolete, grandma-y one, and my grandma's home (interestingly enough!) falls into the former category. So naturally I asked her to share some of her insight with me.

I have always been a big fan of everything vintage, but alas, I had never been brave enough to try it in my own home for fear of looking old-fashioned. But here are the keys to add some vintage elements into your home and still have it look modern and fashionable:


1. Vintage trays and mirrors 
Little trays and mirrors add personality to a space (like a bathroom) but are also simple enough not to make too big a statement. Place little glass bottles on top, adding a pop of color to counteract its effect.


2. Add fresh elements next to old ones
In order to counteract the old feel of a space, add some new, fresh elements into the mix. For example, here she placed a clean vase with some white flowers next to old-looking vintage clock and books, which makes them look more updated.


3. Halls and corridors can use some vintage-loving too
If you have a hall, entryway or corridor that looks too plain, add two or three statement pieces that set the tone for that space. Plus, these pictured containers double as genius storage!


4. Focus on an opaque pastel color palette
A soft color palette can instantly add a vintage character to any room. If blush hues feel too grandma-y for you, however, then you can still play around with some trendier yet still vintage color palettes, such as rose gold.


These little tips are simple enough, and don't necessarily require a big budget. They are perfect if you want to give your house a much-needed makeover, with minimum fuss and expense but major effect.

Please do share, what are your best tips to give a room (or a whole home!) a vintage/romantic vibe?


 photo Button1_zps4b1eff04.png

Wednesday, March 26, 2014

My DIY project: Affordable Decorations For Spring


I sometimes come across beautiful crafts on Pinterest and blogs, and I immediately fall in love with them and want to make them. Then I start actually reading the instructions... Look, I am not extremely gifted in the crafts department, so for me to actually attempt a craft project I need it to be easy and straightforward, yet still useful and pretty. Is that too much to ask?

Turns out no, it's not. I started "My DIY Project" to find just that: easy, simple projects that are great and look like they were a lot more difficult to make. My very first project is to attempt some cute decorations to welcome spring (not that we get any spring whatsoever where I live, but a girl can dream!). I did three mini-projects, perfect to celebrate the arrival of the colorful season. I focused on pink and gold, because I love those colors and go perfectly for the time of year. More importantly, they were incredibly easy and dirt cheap.

The supplies I used were:
- Several canvases in different sizes
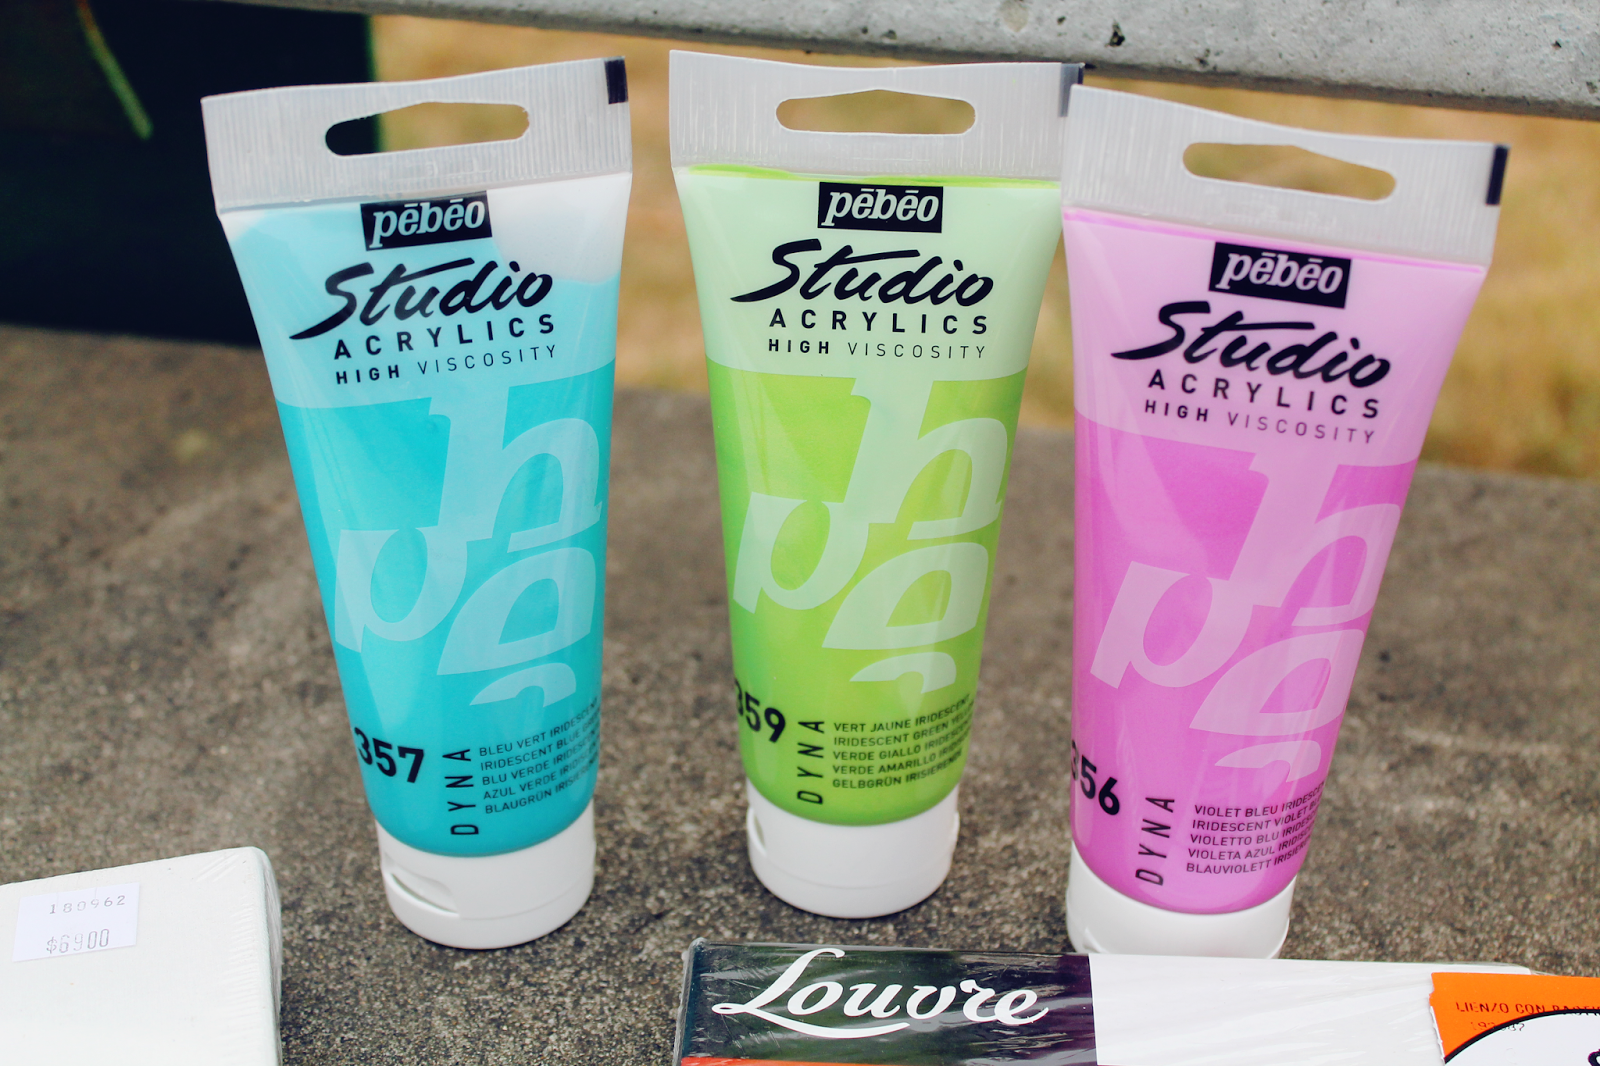
- Acrylic paint in your favorite colors (I chose iridescent ones, because I wanted lots of shimmer!)
- Ribbon
- Used pots/ bottles/ mason jars.
- Circle sponge
- Wrapping paper


1. A little wall art
I am so useless at art, but I gave it a shot and was very proud of having left my comfort zone for this. Even if it didn't turn out amazing and stunning, it is mine and I actually quite like the imperfect look. For the first canvas, I was inspired by this statement wall. I think it is gorgeous and creative, so I decided to incorporate it onto my little canvas with one of my favorite sentences: "Trust The Universe". This took all of 15 minutes to make, plus drying time. Simple as that.

super chipped nails  (I know, I know!)
You can always go over with some white paint and correct little mistakes!


Then I took the larger canvas, and painted the whole surface with iridescent pink acrylic paint. Then all I did was cut out some stripes of gold ribbon and glue them, leaving about 1/2 inch between each of them to create the pink/gold stripes. Again, this took about 15 minutes.

The medium canvas I gave to my husband to decorate, and he opted for some chinese characters in gold and black, and some iridescent navy polka dots which he achieved with the circle sponge.


2. Pencil Holders
I have a *small* obsession with beauty/bath/body products. There, I said it. So I have a collection of used pots and containers, and this was the perfect opportunity to upcycle them. I simply bought three sheets of the most gorgeous wrapping paper I found at the store, and wrapped some of the pots with a different design. It was as easy as that. They now look a lot cuter and very useful to store all those bits and pieces we have lying around in the house.

Note: make sure your containers are clean. If you remove the tags (I did), wipe the container with some rubbing alcohol to completely remove all the sticky residue left.

On one of the pots, my husband drew a little tribal rose which I then painted pink, and also painted the rim gold.

And for the polka-dot one,  I simply used the circle sponge to dab some polka dots in different colors. Then I went over the rim of the pot with gold acrylic paint to give it a more "finished" look. It is a very simple pot, but the little pops of color make it perfect for spring and for planting some seeds or a cute little flower inside. This took all five minutes to make!


3. I then chose to use the big mason jar as a vase to give it an even more spring-y feel. I bought some cute fake flowers and put them in there, and don't they look pretty? Now they sit in my room.

I am a proud little bee now with my cute new spring decorations, imperfections and all!
Please let me know if you are going to try any of these :)


 photo Button1_zps4b1eff04.png

Thursday, January 30, 2014

How To Implement Feng Shui At Work + Great Decor Tips

Feng Shui is a Chinese approach to harmonizing our life with our environment and surroundings. It basically states that the colors, position and other aspects of a particular area have an effect on the energy of said area. What this means is that the way you arrange your stuff at work and the colors you have there can impact on the positive or negative energy of your office. Feng Shui also states that the condition of your environment mirrors your life.

It  certainly won't prevent those stressful situations that life inevitably throws upon us from happening, but it will make your environment (in this case the office, where we tend to spend the majority of our time) more balanced (therefore making it a much better place to be at!).
I have compiled here some tips, all incredibly easy to implement, and some of then even work for home too!

For The Office In General
- Get plants. Plants absorb negative energy and counteract the effect of electronics (which tend to absorb the positive one).
- Always leave the toilet lid down.
- If your workplace has a metal safe, it should be placed to the West or Northwest.
- Mirrors are not advisable if you have clients constantly coming into your office, as their negative energy can be reflected into the room.
- A small water fountain, aquarium, or any other symbol of water are said to generate wealth. Even an image of water as your screensaver will work.
Source

For Your Desk:
- First and foremost, eliminate clutter.
- If you have flowers, face them East.
- Your lamp should face South.
- Face your computer West.
- The best location for your desk is with your back to the wall.
- Also, don't work with your back to the door.
- Have something red to look at at all times (a notebook, a stapler, something in your line of sight).
- Try to avoid facing stairs, hallways and bathrooms.
- Try to keep all cords hidden. One option is to drill a little hole in your desk, and mount a power-surge protector on the underside.
- Don't place scissors and other sharp objects on your desk. Always keep them in a drawer.

No Clutter; A red flag to stare at; Big plants; Hidden Cords.
Source


For Your Outfit
- Wearing green is said to increase your confidence.
- Red, orange and yellow attract positive energy (yang). This is even more encouraged for the winter months, when the yang is weaker.
- Wearing white is associated with authority.
Gorgeous and Feng-Shui-friendly outfit: win-win!
Source


While some of these tips might seem silly, they aren't all that difficult, so why not try them out?
Don't expect huge changes, though. You won't be super wealthy overnight. But your positive energy might start increasing, and one day you may notice that you are not easily frustrated anymore, and that for me is a humongous change in and of itself!

As for decor, check out these links below with great tips from professional decorators:
6 Tips For A Chic And Tidy Desk at LaurenConrad.com
Desk Organizing Ideas by Martha Stewart
8 Ways To Reorganize And Refresh Your Home Office by Pottery Barn
Get Inspired By This Chic Home Office by Pottery Barn
How To Organize Your Desk Like Carolina Herrera by Elle Decor
Office Inspiration Photo Gallery by Houzz


 photo Footer_zps0751fb70.jpg

Tuesday, January 7, 2014

Homemade Scented Candles

For Christmas, my very DIY-oriented mom gave away some stunning scented candles to friends and family. I thought they looked stunning, and since I am pretty much obsessed with scented candles, I had to ask her to teach me. As it turns out, it is not at all difficult. To make them, you will need:
  • Tin or pot
  • Liquid paraffin (the amount depends on how big your tin/pot is)
  • The fragrance or essential oil of your preference (Lavender, Cinnamon, Vanilla, Lemongrass... whatever you want your candle to smell like)
  • Poppy paint (optional)
  • White paint and any other color you wish to use
  • A strong cotton cord or string for the wicks
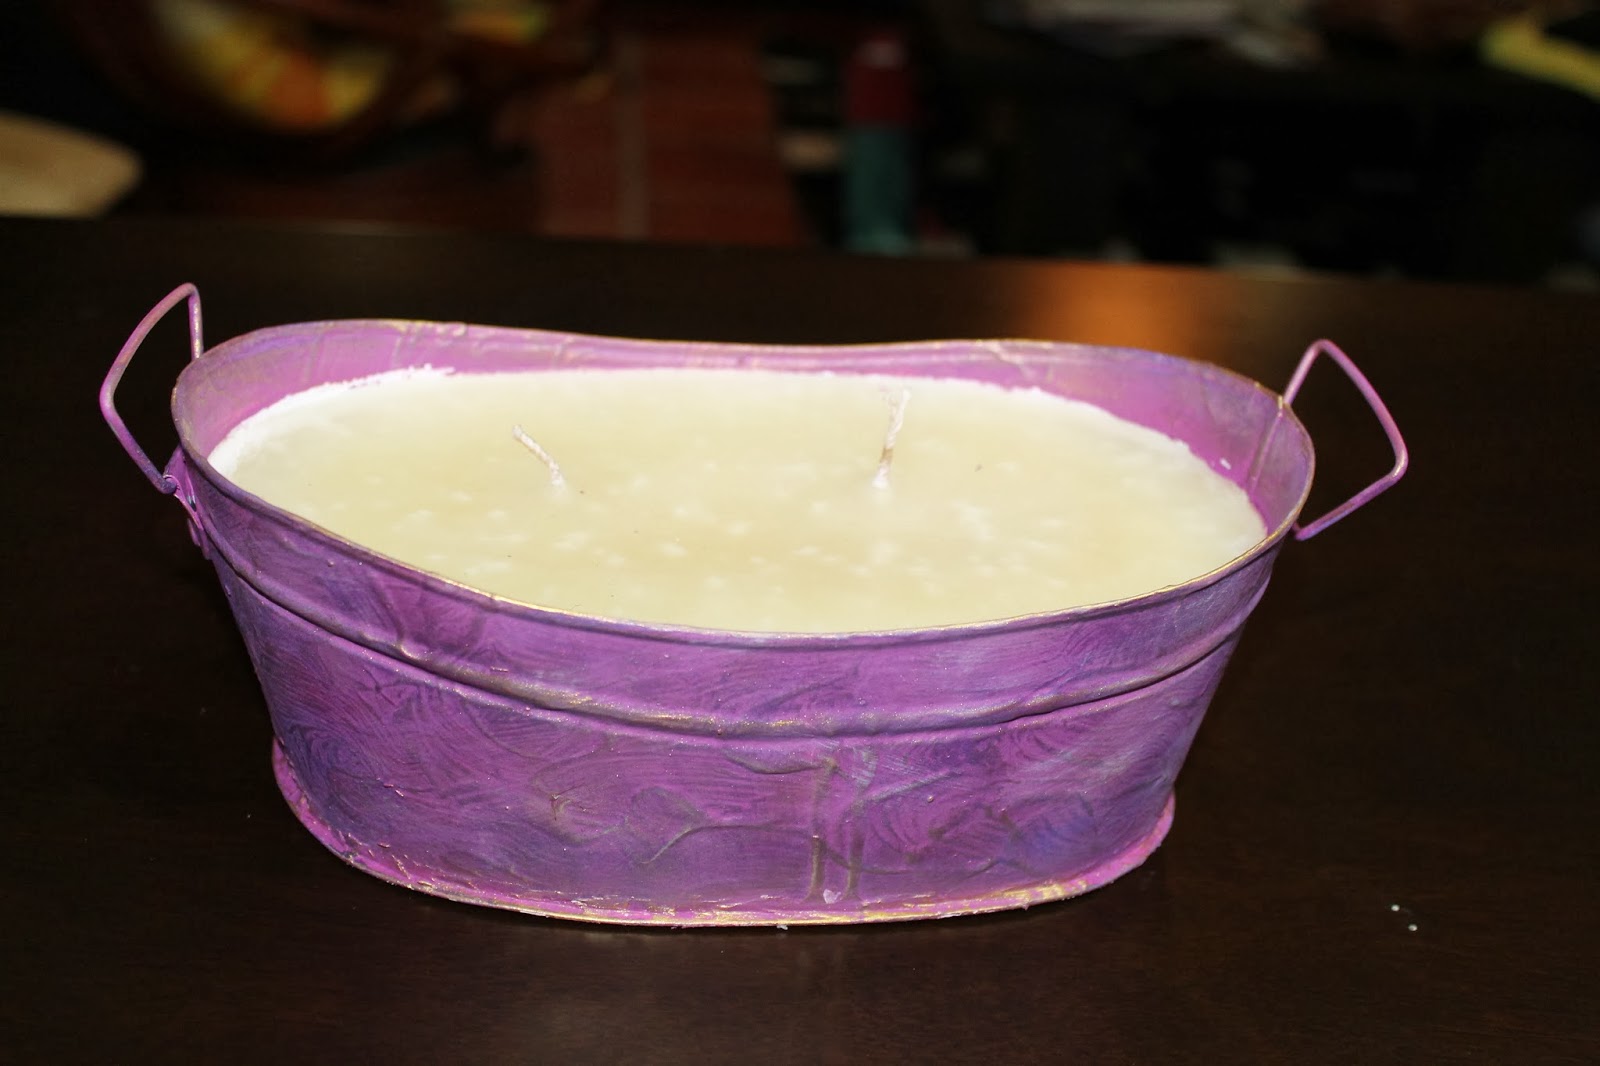
The first thing you'll need to do is paint your whole tin white, to even out the surface and to make the rest of the paint look brighter and stick better to the tin. At this point, you can choose to make some designs with poppy paint in order to give it more texture. Another technique she taught me for texture (shown in the picture below) is to dip your brush in the white paint and then wipe it until the brush is almost dry. Then paint the tin with several, irregular strokes in different shapes until it is all covered.


Once it has fully dried, it's time to create the actual candle. First, you'll need to make sure that your wicks stand straight once the candle is finished: what I do is stick the cords to the bottom of the tin with a little ball of play-doh, and I hold them up, looping the ends (which will become the wicks) around a pencil or some long stick, ensuring that the wicks stay in place. For big tins, I like making three wicks for a better throw.

Now, pour the paraffin and the fragrance oil into the tin. Let the paraffin solidify over a good 24 hours. 
Once the paraffin is solid, trim the wicks to your desired length (1/2 inch or so is a good standard).


Now it's time to get creative: paint your tin however you want: personalize it with a nice message for someone, comforting words (like my mom did), or even write your favorite quote on it. The sky is the limit here!


Love, Peace, Faith... encouraging words and hearts make this a gorgeous candle


And then there's this one, made for me and Sean with our wedding details on it:


Everyone who received these candles for Christmas was absolutely delighted. But since the Christmas season is over now, why not make some to put around in your house? They will certainly add a lot of character and are quite the conversation starters. 


Tuesday, December 17, 2013

Home Accents

Fully decorating a home can be challenging for so many reasons: budget, lack of skills, or in my case for example, the fact that we move so often that we find it incredibly overwhelming to fully decorate it every time.

My tip in this case is to have some key accents around your home that make it cozy and inviting, and can multitask (thus not requiring much else). Some of my home accents include:

1. A gorgeous iron tree that we recently got as a wedding present doubles as a bed header and wall decor, giving our bedroom a lot of character. Just one statement-making piece makes all the difference in a room.


2. Scented candles. Scented candles everywhere! I have an (unhealthy) obsession with them: for me there are few pleasures like that of entering a lovely-smelling room. Spread them around your house and they will make sure it looks great too. 


3. Kids art: Kids make cute little works of art all the time, like this pretty tea light holder my 3-year-old made. Showing off their work in your home will also make them feel really proud.


4. Create some fun/ festive/ cute designs on little items around the house, such as napkin holders and coasters. They will brighten up the space. (This particular napkin holder was made by my mom using Christmas napkins, I am not nearly as talented!).


5.  For the kitchen, choose a couple of items to stand out, which will give it that chick and modern look. For mine, I chose the toaster and kettle and they really pop in my kitchen.


I have always believed that there is no need to splurge in thousands of items to make a home your own. Perhaps when I settle in one place for good (around 2015) I will, but for now all those little details really make a difference in the feel of our house.


Monday, December 2, 2013

DIY Advent Calendar

December has officially started, and with it the holiday season has now begun in full force. I love seeing the streets fill with lights, seeing Christmas trees everywhere I go, and even listening to carols. Ever since I was little, the holidays have filled me with such joy, and I get all giddy with the excitement and the good energy this time of the year brings. 25 years old and I still enjoy Christmas like the next kid. My 3-year-old is now a lot more aware of the festivities, too, and therefore excited about what's to come, so I set out to find something special and meaningful, something to start creating magical memories for him about this time of the year.

That's when I suddenly started seeing hundreds of DIY advent calendars popping up on my social media feeds, such as herehere and here. Even though I am not very crafty, I was adamant that I wanted to recreate them and make my own calendar for him. It is definitely not as pretty as the ones you'd find at the store, but there was something so special about sitting one afternoon with Sean and making this for our kid. It made me really proud when it was finished, and I couldn't wait for Tommy to start opening the little pockets (most of them are little chocolates or candy, some are other small surprises).


Making it was easier than I had envisioned, and it only required some wrapping paper, some sort of cord (twine is great, but if like me, you only have wool available, that works too!), and somewhere to hang the pockets from (we just went downstairs and grabbed a branch!). From there, it was only a matter of wrapping the little presents and hanging them from the branch. It doesn't get any simpler than that (although it could get a little prettier haha). I'm certain Tommy will enjoy it as much as I am, and hopefully this can be something that we do every year.

Here's to hoping that your holidays are filled with laughter, love, compassion, smiles and lots of yummy yummy food!
Do you have any special plans for the holidays?  what is the most meaningful holiday tradition you have?


Tuesday, November 26, 2013

It's beginning to look a lot like Christmas...

Christmas is now less than a month away!! .. crazy how fast this year went by, and crazy how many things changed for us this year. I think it is worth a celebration, for all the things we accomplished, all the changes we went through, and all the great things ahead of us. This Christmas is also extra special, because for the first time ever, both my family and Sean's will come together to celebrate it! How awesome is that? Who knows when that will happen again, so we better make the best of it. And let's not forget that we are getting married four days before...!! This Christmas is gonna kick some serious ass!

I was adamant that I wanted a beautifully decorated home for those very reasons, and I'm convinced we don't have to spend a lot of money or buy a hundred things to achieve it. Some creativity is all that's needed to create a special home for the holidays.

You don't need to have the fanciest or tallest Christmas tree for it to be special. For instance, last week we received a Christmas tree that belonged to my grandmother, and is a lot more meaningful than a brand new one, even though it is pretty small and old. (I have to say here that we don't really have real pine tress here in Colombia, so 99% of our Christmas trees are fake).
When the parcel arrived, Tommy was so excited and eager to build it straight away: We let him put the mat down, build some of the branches, and then help decorate it. We even went and got him his own decorations at a department store so he would feel like an important part in this whole "event", and he loved it. It might not be a stunning tree, but it's definitely special and does provide our house with the Christmassy feel we want.


The final result after hanging all the decorations:


My personal favorite is this vintage Mickey and Minnie ball:


This beautiful bell also came with the tree. I think it'll look great hanging on our door:


The tree is looking a little sloppy, so I will tidy it up a bit and maybe get one or two more decorations. However, I'm thinking I will keep the whole Christmas decor minimalistic: hang the stockings, bring out our Christmas mantlepiece, buy a few Christmas hats, some LED lights around the house and that should be it. I'm not one to go too over the top, simplicity is always my ally when decorating.


Pssst: don't forget to enter my current giveaway!!  You might win a beautiful Denik notebook, perfect to give to someone special or keep to yourself!


Monday, November 4, 2013

Chevron Home Decor

I have shared my love of Chevron prints on several occasions already, like here and here; but I thought I would dedicate one entire post to it. If I could, I would decorate my entire house in Chevron print. I might at some point, probably when we find a house we want to settle in (read: in New Zealand).

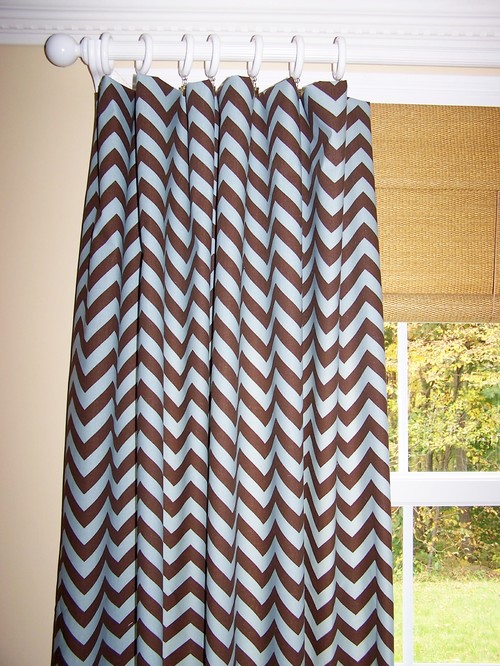
I know, the world is currently invaded by Chevron print. Some call it a "Chevron Madness", but in my opinion it is totally justified. I don't think it will go away any time soon. My favorite thing about this print is that you can incorporate it into all sorts of little details around your house: bedding, rugs, wall art, even mugs. It is practically fool-proof (perfect for me, as my decorating skills are, let's say, somewhat limited). With a few of these items around and not much else, your home will still look beautifully decorated.

Here are some items I found and love. They add quite a bit of life to these homes, don't ya' think?:


There are literally thousands of options out there to decorate your home with: Chevron prints come in every color there is, in almost every single style, so don't be afraid to play around a little with some fun, unexpected objects like the switch cover on the last picture. It will give your home a much more relaxed, youthful vibe. If your home is in need of an update, or a little makeover, Chevron prints will achieve it with just a few, key elements, making it a stylish, yet inexpensive option! So really, what is there not to love!?

Sources:
1. Home Goods
2. The House of Smiths
3. Freshome
4. Etsy
5. Overstock.com
6. Houzz
7. Etsy
8. Etsy


Related Posts Plugin for WordPress, Blogger...